Force Set CPU Frequency on Linux

So I have had to disable the CPU frequency scaling in a recent project. I found that it isn’t as straightforward in Ubuntu 16.04 anymore, because of Intel’s p_state.

Thus, if you want to explicitly set the frequency of the CPU, you now need to disable p_state to go back to ACPI cpufreq.

First, we want to modify grub and update the line:

such that it now reads:

Next, let’s update grub by:

After restarting the computer, you should be able to see that /sys/devices/system/cpu/cpu0/cpufreq/scaling_available_governors now exists again.
Expanding VMware Player Disk Size for Ubuntu

I run a lot of virtual machines and quite often, my initial disk size starts running out because the lifespan of the VM becomes longer than I originally expected. Hence, I need to expand the disk size, and below is how I go about doing this.

1. With your virtual machine turned off, under your VMware “Virtual Machine Settings”, under “Hard Disk (SCSI)”, click “Expand”

2. With the size expanded, turn on your Ubuntu VM and install “GParted”:

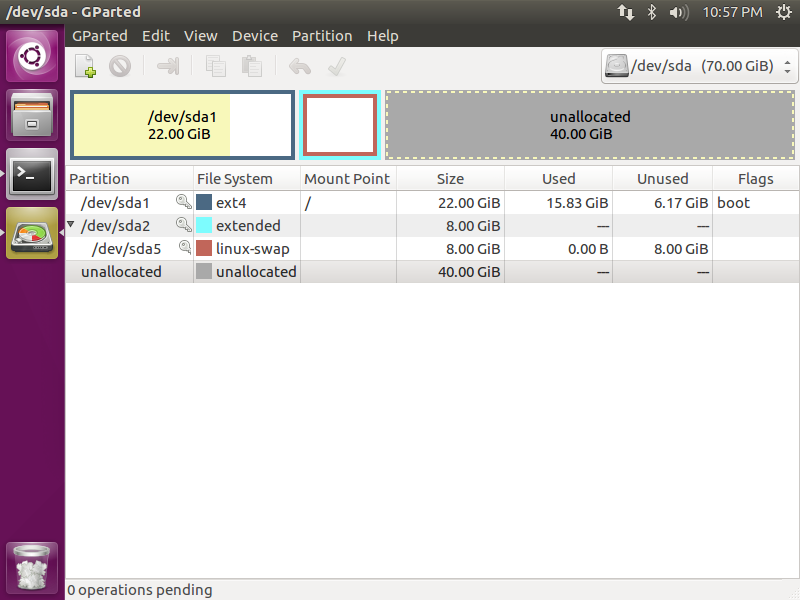
3. Run GParted (it may require sudo) and you should see something like the following:

4. For my case, you can see the unallocated 40 GB of space that I just added, and the swap at /dev/sda5. Right click /dev/sda5 and select Swapoff.

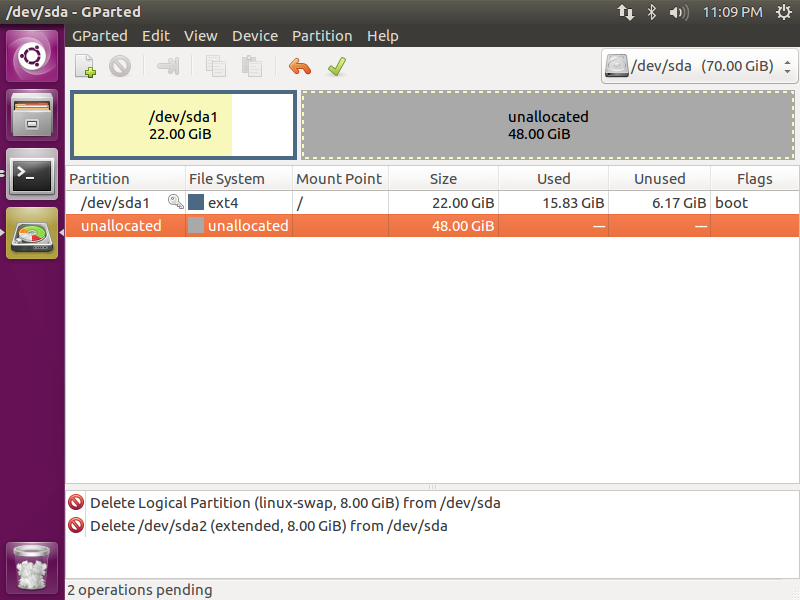
5. Now Delete /dev/sda5 and then also delete /dev/sda2 to only leave /dev/sda1 and the unallocated space.

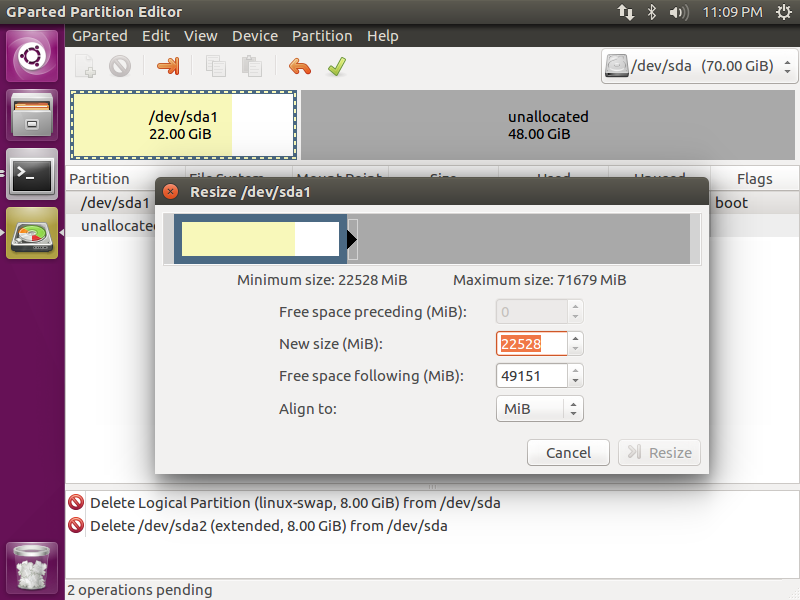
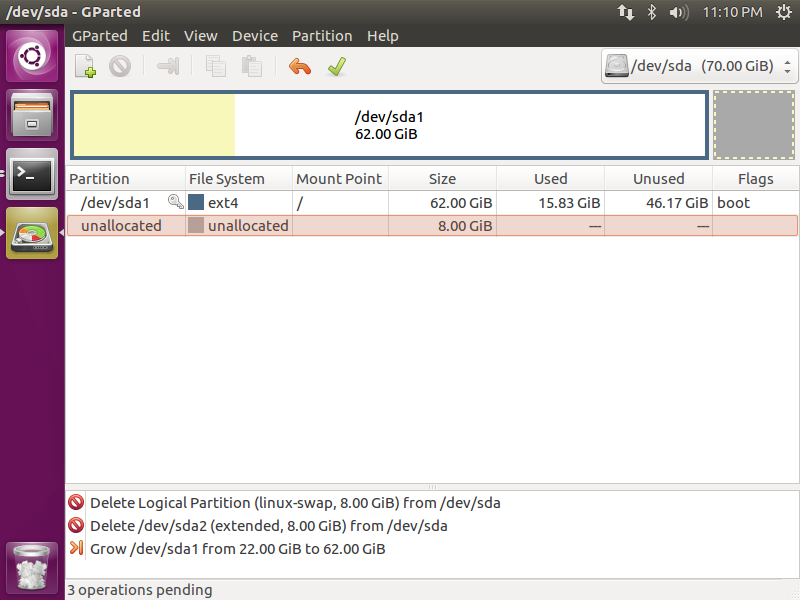
6. Right click /dev/sda1 and Resize. In my case, I left the same amount of space for swap as before (8192 MB).

7. Click the green check mark to apply the changes.

8. With the 8 GB, create a new partition as a “linux-swap” partition and apply the changes.

9. Now, you should see the swap partition at the end of your disk. Right click the swap and set “swapon” to finish.